Hexo简单使用
This is your very first post. Check documentation for more info. If you get any problems when using Hexo, you can find the answer in troubleshooting or you can ask me on GitHub.
注意⚠️:需要在博客项目文件夹路径下执行hexo命令!命令行export代理后,部署到github更快
Quick Start
Create a new post
1 | $ hexo new "My New Post" |
More info: Writing
Run server
1 | $ hexo server |
More info: Server
Generate static files
1 | $ hexo generate |
More info: Generating
Deploy to remote sites
1 | $ hexo deploy |
More info: Deployment, https://zhuanlan.zhihu.com/p/71544809
逻辑:新建hexo分支,保存hexo博客源码到github的hexo 分支,然后默认待渲染的HTML项目放到master分支
Generate and deploy in one command
1 | $ hexo g -d |
Attention!
注意hexo和node版本号必须要匹配,否则会出现编译公式显示问题,以及无法部署到github上等问题(例如ERR_INVALID_ARG_TYPE)。升级hexo配置有点麻烦,可以暂时降级node到合适的版本号,例如Hexo 4.2.1应该使用Node 12.18.3,这样可以快速修复或者继续使用之前的hexo项目。
降低版本方法参考:https://blog.csdn.net/weixin_46316234/article/details/121475363
安装node版本管理模块 n
1
sudo npm install n -g
可以根据自己的需要选择安装版本[可选]
2.1 安装稳定版1
sudo n stable
2.2 安装最新版
1
sudo n latest
2.3 版本降级/升级
1
sudo n 版本号 // 8.16.0 / 12.8.3
在主题文件夹—>package.json—>搜索“version”,得知当前我使用的Next主题版本号为”version”: “7.7.0”
Hexo版本和官方最新落后情况可以使用命令
npm outdate查询: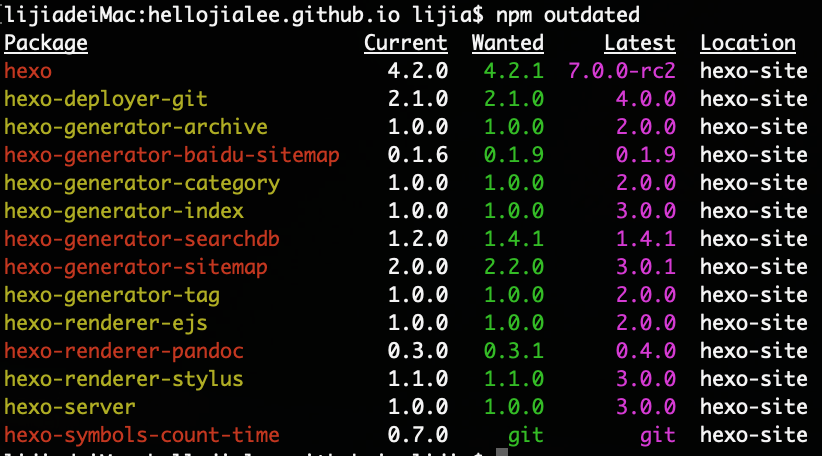
以下搬运自我的CSDN博客 hexo实用技巧随记
关于hexo
默认起始页定制
hexo默认起始页是发表的博客罗列,我懒得整了。想要自定义起始页可以参考这个博文:https://qingchen1995.gitee.io/2021/10/20/2110-Change-Blog-Index/
安装hexo及主题
安装hexo,可以参考:用 Hexo 和 GitHub Pages 搭建博客
解决latex公式渲染的问题
1 | npm uninstall hexo-renderer-marked --save |
然后到配置的主题next下的配置文件 /Users/lijia/科研&学习/github博客/themes/next/_config.yml,更改配置如下:
1 | math: |
行内数学公式显示异常
未知问题:有时在typora中显示正常的行内数学公式,在hexo中就显示异常了,比如下面一个情况
暂时的解决办法:
通过尝试发现,对于有些显示不正常的行内公式$X=\left(x_{1}, x_{2}, \ldots, x_{n}\right)$我们只需要在前面或者后面一个$符号插入一个空格, 或者在前后都插入一个空格,公式渲染显示就正常了。
而且有时例如需要\left( x_{1} 在\left(后插入一个空格。有可能是node版本和hexo不兼容出现的编译问题
更改markdown信息头模板
默认的信息头不全,我们把markdown模板 /Users/lijia/科研&学习/github博客/scaffolds/post.md 里面最开始的信息更改如下:
1 | title: {{ title }} |
添加搜索功能
首先在blog文件夹目录下安装依赖npm install hexo-generator-searchdb --save
然后在站点配置文件中_config.yml中增加如下内容
1 | search: |
最后在主题配置文件(\themes\next_config.yml),修改local_search的值如下
1 | # Local search |
关于next主题
首先进入本地blog目录,使用git clone,把主题项目克隆下来,git clone https://github.com/theme-next/hexo-theme-next themes/next
然后在站点配置文件中更改theme选项为 next.
更改主题细节设置
页面配置
设置开始页面显示,设置头像,设置社交媒体链接等等,
可以参考这个博客:Linux下使用 github+hexo 搭建个人博客04-next主题优化
或者参考这个文章:Hexo+Next配置Blog
更改默认字体大小
主题默认的字体太大了,一个页面放不下很多内容,根据我们创建的路径,在/Users/lijia/科研&学习/github博客/themes/next/source/css/_variables/base.styl 中找到font size,把font-size-base默认值更改即可
1 | // Font size |
网址缩略图

如果我们想要更改网址栏左侧的缩略图标,我们先制作好图标,放入对应的 /Users/lijia/科研&学习/github博客/themes/next/source/images 文件夹下,然后更改主题(我们用的是next)下的配置文件如下:
1 | favicon: |
接入评论系统以及文章阅读次数显示
参考:
http://www.zhangblog.com/2019/06/16/hexo05/
http://www.zhangblog.com/2019/06/16/hexo06/
使用 LeanCloud,可以同时实现评论留言系统以及文章阅读次数统计。1
2
3
4
5
6
7
8
9
10
11
12
13
14# Valine
# For more information: https://valine.js.org, https://github.com/xCss/Valine
valine:
enable: true
appid: hcHrBNtFBdqhBMIhjL67LT0t-gzGzoHsz # Your leancloud application appid
appkey: Pe1HEgFp3AUcNCQ7dpQ3HRE4 # Your leancloud application appkey
notify: false # Mail notifier
verify: false # Verification code
placeholder: 欢迎讨论留言! # Comment box placeholder
avatar: mm # Gravatar style
guest_info: nick,mail,link # Custom comment header
pageSize: 10 # Pagination size
language: # Language, available values: en, zh-cn
visitor: true # Article reading statistic # 这里控制显示文章阅读次数
设置完成后文章的开头就会显示如下:
增加了 Views 和 Valine,而博客文章下面就有了留言板。
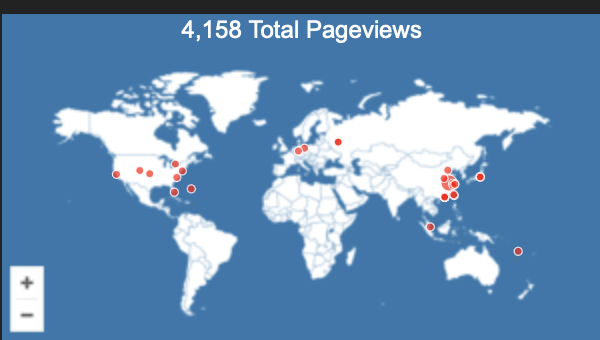
Side bar添加访问者ip地区地图
使用clustrmaps,选择插件风格,拷贝网站出现的脚本 javascript代码
1 | <script type='text/javascript' id='clustrmaps' src='//cdn.clustrmaps.com/map_v2.js?cl=fff&w=a&t=n&d=QL- 巴拉巴拉省略号 -xB3pA6RxWIY'></script> |
粘贴到Next主题下某个位置,参考链接中给出了两个可插入上述代码的配置文件,这里我们选择了其中一个位置的配置文件/***jlee.github.io/themes/next/layout/_macro/sidebar.swig粘贴代码,插入如下:
1 | <aside class="sidebar"> |
最后我们来看一下效果